Showing posts with label doll or figure. Show all posts

Make a Ballerina Doll


Clay used in this tutorial is a soft air-dry clay such as Makin's Clay, Deco Clay or Cold Porcelain.  Some white, a small amount that's been tinted pink, and a larger quantity tinted flesh.
  1. Cut a strip of pink clay for bodice.  Tool shown is a fondant cutting and embossing tool with changeable blades for creating different textures.  It's inexpensive and works well with the soft clay.
  2. Use circle cutter to cut white circle.  This will be undergarment.
  3. For head, wrap a foam ball with flesh clay, starting with a ball of clay about same size as foam ball. 
  4. For torso, wrap a foam ball with flesh clay, starting with a ball of clay about twice the size as foam ball and shaping clay into a teardrop shape.
  5. Roll 2 flesh colored logs for legs.  Set aside to dry until needed.
  6. Wrap white circle cut in step 2 around bottom of torso and add texture.
  7. Roll 2 more flesh colored logs for arms.  Flatten ends for hand and use scissors to cut a notch that will create thumb.  Set aside to dry until needed.
  8. Attach legs to body in sitting position.  Use white glue if needed to hold in place.  
  9. Wrap pink bodice made in step 1 around top of torso.
  10. Make shoes from pink and white as shown in photo and attach to leg.  Strengthen joint with piece of toothpick and a little glue.
  11. Make a tutu from pink fabric and wrap around torso.  Stitch to hold secure.
  12. Attach head.   Strengthen joint with piece of toothpick and a little glue.
  13. Attach arms.  
  14. Let doll dry and cure until OK to handle without damage.
  15. Glue yarn or string onto head.   Trim for cute hairdo.
  16. Make a bow from clay and glue to top of head.
  17. Use acrylics to paint eyes, lashes and mouth.   Use powder to blush the cheeks.
  18. Use a dot tool and white acrylic paint to place dots in eyes, on cheeks and all over bow and bodice and you're done!

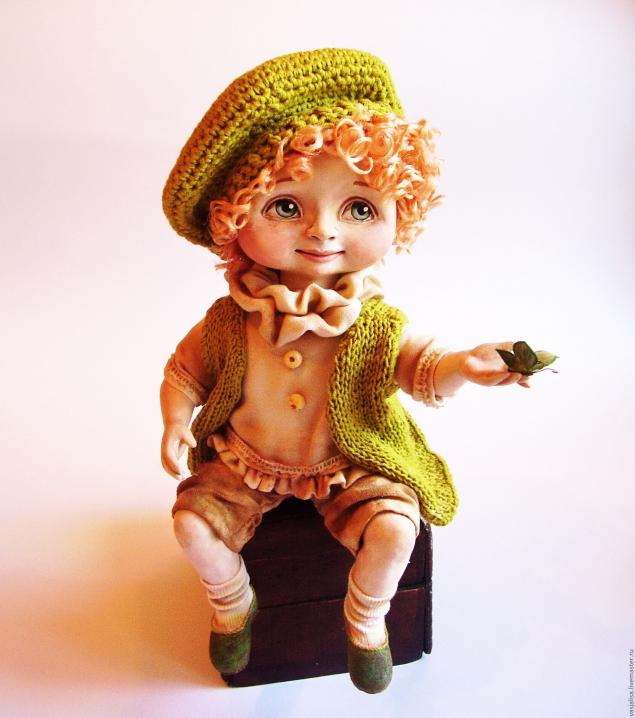
Modeling a Doll with Paperclay, Part 4 of 4. Dressing & Posing


The final part of this step-by-step tutorial from Russian artist Dyachenko Oksana creates the clothing, shoes and props for posing the doll created in Parts 1-3. Lots of photos show how she applies fabric to the doll body, cuts to fit, and sews concealed seams directly on the doll.

Hope you've enjoyed this 4 part tutorial and the techniques presented to create this cute doll made of Creative Paperclay.   Cold porcelain and many other air-dry clay brands could be used in the same manner.

This series of tutorials is presented in Russian, please use Google Translate (or your own favorite tool) to convert to your language.


Modeling a Doll with Paperclay, Part 3 of 4, Finishing Body


Part 3 of this step-by-step tutorial from Russian artist Dyachenko Oksana shows how to sculpt and attach hands to the body we made in Part 2 and additional finishing steps.    Lots of photos show the modeling of the hands with Creative Paperclay along with covering the arms and legs  in the 'clay over cloth' technique.  Shoes made of Paperclay are also modeled.   The artist then tea-stains the clay to create a fleshtone and also adds color with acrylic paint where needed.

The final step for Part 3 is to create a body stocking from knitted material to neatly cover the stuffed body.  Because clothing will be created in Part 4 that will cover the doll, the body stocking can be omitted.  However, it is a nice, finishing touch that completes a well-made doll.

This series of tutorials is presented in Russian, please use Google Translate (or your own favorite tool) to convert to your language.

Modeling a Doll with Paperclay, Part 2 of 4. Armature & Body


This step-by-step doll tutorial from Russian artist Dyachenko Oksana describes her method for creating a sturdy body armature and increasing volume of the body with paper. (She says it's toilet paper but looks more like paper towels...LOL)   There's lots of photos showing how she stuffs and wraps armature with paper and then secures it with string before posing the doll.  The next tutorial in this series will create the hands and feet with Creative Paperclay.   If you missed it, the tutorial for modeling the head is here.


Modeling a Doll with Paperclay, Part 1 Head


This step-by-step tutorial from Russian artist Dyachenko Oksana shows in great detail, with lots of photos, how to model a dolls head using Creative Paperclay.  Author also shows how she paints the face.  Additional tutorials will be posted soon for creating the body! .


Part 2 of 4. Armature & Body

Part 3 of 4, Finishing Body

Part 4 of 4. Dressing & Posing

Making Paperclay Doll Eyes

Eyes colored with pencils worn by Dollzone Leo


Author of tutorial says making Paperclay eyes for your doll is very simple. The eyes shown here started as beads of Creative Paperclay and were colored using artist pencils and acrylic paint.   A glossy finish was sprayed on.  These eyes were created for a BJD doll but could be used with any clay figure.  Read entire eye tutorial here.

Garden bunny shelf sitters


Aren't these shelf sitters cute? Easy to make and great summer decoration.

Made with air-dry cold porcelain, using rope for legs and pushmold for tiny flowers. Embellished with mini garden tools and wire. Good beginner project! See the Rabbit Gardeners tutorial at Creaclic.

Tutorial is in French but Google can translate for you.


Did you know that you can use sugarcraft techniques with cold porcelain?
Did you know you can make your own cold porcelain at home?
See some cold porcelain recipes at this blog:   Cold Porcelain Tutorials

Art Dolls: Clay Over Cloth How-to

Photobucket
"Frost Fairy" a clay over cloth doll by Yve
Quite often art dolls are created with clay head, hands and feet attached to a fiber-filled cloth body (which is all covered with clothing). But did you know you can apply air-dry clay directly to a stuffed cloth doll?  This is done for a number of reasons.  A layer of clay can hide seams and give a nice, smooth surface for painting facial features but still have a soft, squishy body.   Dimensional details such as nose, lips, eyelids, etc are easy to add with the clay.  Some artists prefer to needle-sculpt the face details before applying Creative Paperclay while others, like the artist show here, prefer to make these dolls with a flat, unsculpted cloth face and add features with Creative Paperclay.   The added bonus is you can make a poseable button-jointed cloth doll a lot easier and faster than a BJD!

How to Paint on Black Stockings


This short video from Regina Edwards of White Gothic Studios shows how to paint a black stocking on a polymer clay or air-dry clay doll leg.  This is a great technique to create the illusion of garter stockings very realistically on a small scale doll. Regina uses a glaze paint to create the stocking look.

Sculpting Head and Face for BJD

~ click photos to enlarge ~    
Linda Macario, the Italian doll-maker, has written a wonderful tutorial for creating the head for a BJD (ball-jointed doll) .   LaDoll air-dry clay is suggested.  Creative Paperclay would also be suitable for this project.   Lots of photos demonstrate how to sculpt the Styrofoam core, apply the clay, model the facial features, hollow out the head & insert the eyes and also create the head articulation.

Creating a Body for Art Doll


These are instructions for creating a sturdy wire frame doll armature that is also padded and wrapped to complete the body of an art doll.   This type of art doll body is designed to have a clay head, arms/hands and legs/feet attached and to be permanently covered with clothing.   This body form is bendable and positionable, but, once placed in desired position, it's not usually re-positioned again and again like a jointed doll would be.

Make a Skinny Doll Ballerina


Create this cute ballerina skinny doll from cold porcelain following these instructions from Giselle of  Gisarteira Atelier.  Customize the doll to your own preference!  Other air-dry clays could be used in place of cold porcelain.

Step by step instructions (in English) follow the video (which is written in Portuguese).

Paperclay Stump Doll


Stylized and aged with crackle finish, this 'Dancing Girl' Paperclay stump doll from Miss Sophie Arts looks like it'd be a lot of fun to make.  The author sculpts heads and necks from Paperclay but their bodies use a paper mache technique.


Modeling a Simple Doll Face


In this video, Christina Albuquerque of Brazil shows us how to model a simple face.  This cute doll head has an easy 'button' nose and the eyes will be painted on after clay dries.  Learn this basic face first and then you can customize with different expressions. Christina starts with a ball of cold porcelain that is the same size as the Styrofoam ball that will be

How to Use a Doll Face Push Mold

Baby Face "Scarecrow" Doll by Jorge Rubicce
In this video from the South American TV show "Bienvenidas" (Welcome), Jorge Rubicce demonstrates the proper method for using his doll face push molds.    Rubicce is a well-known cold porcelain clay artist and is designer of these molds, which are much larger than the doll push molds

Sleeping Baby by Wilson Cabral


Today's demonstraton is from well-known clay artist Wilson Cabral. In this video he shows us, step by step, how to create the cute sleeping baby shown above using cold porcelain. Other soft air-dry clays would work as