

Air Dry Clay Tutorials
Tips and Tutorials for sculpting and modeling with air-dry, no-bake, self hardening clays and modeling compounds
Showing posts with label Creative Paperclay. Show all posts
Showing posts with label Creative Paperclay. Show all posts

Sculpting a Small BJD Head in Paperclay

Be My Valentine

Gloriann Irizarry (byglori.com) says: lets celebrate Valentine's Day "....with a special Be Mine Valentine 3D wall art canvas. Using my Black cat Romeo has an inspiration I created this OOAK Be Mine Card in a canvas using the Creative Paperclay to sculpted 3D and make it literally pop out of the canvas." Click here for step by step photo tutorial.
Modeling a Doll with Paperclay, Part 4 of 4. Dressing & Posing
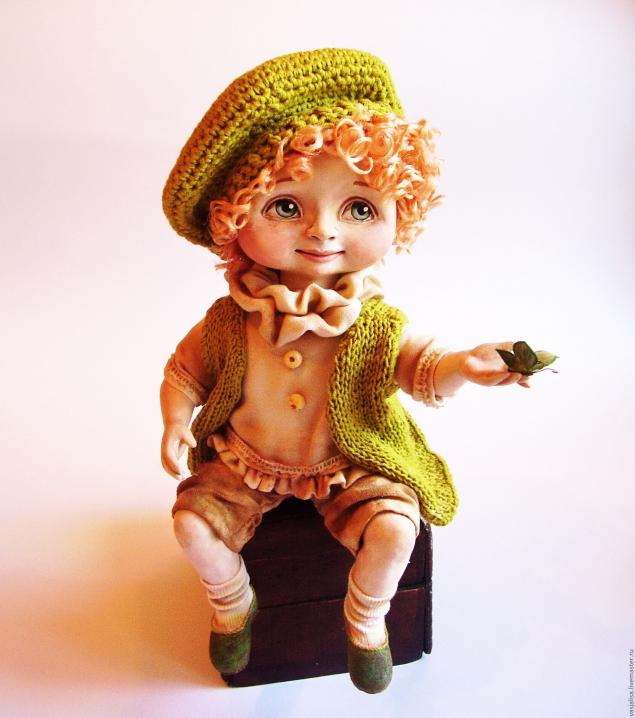
Hope you've enjoyed this 4 part tutorial and the techniques presented to create this cute doll made of Creative Paperclay. Cold porcelain and many other air-dry clay brands could be used in the same manner.

This series of tutorials is presented in Russian, please use Google Translate (or your own favorite tool) to convert to your language.

Modeling a Doll with Paperclay, Part 3 of 4, Finishing Body

The final step for Part 3 is to create a body stocking from knitted material to neatly cover the stuffed body. Because clothing will be created in Part 4 that will cover the doll, the body stocking can be omitted. However, it is a nice, finishing touch that completes a well-made doll.
This series of tutorials is presented in Russian, please use Google Translate (or your own favorite tool) to convert to your language.
Modeling a Doll with Paperclay, Part 2 of 4. Armature & Body

This step-by-step doll tutorial from Russian artist Dyachenko Oksana describes her method for creating a sturdy body armature and increasing volume of the body with paper. (She says it's toilet paper but looks more like paper towels...LOL) There's lots of photos showing how she stuffs and wraps armature with paper and then secures it with string before posing the doll. The next tutorial in this series will create the hands and feet with Creative Paperclay. If you missed it, the tutorial for modeling the head is here.

Modeling a Doll with Paperclay, Part 1 Head

This step-by-step tutorial from Russian artist Dyachenko Oksana shows in great detail, with lots of photos, how to model a dolls head using Creative Paperclay. Author also shows how she paints the face. Additional tutorials will be posted soon for creating the body! .

Part 3 of 4, Finishing Body
Part 4 of 4. Dressing & Posing
How to Create a Clay Unicorn

Because the artist plans on creating a mold, he is using Plasteline clay, which is an oil-based clay which does not harden. The Plasteline figure will be discarded after casting. The author says: "I'm not narrowing down the materials too much. The actual sculpting medium you use is entirely up to you, and this tutorial will focus on my process more than anything. I sculpt using many materials- polymer clay, air-dry stoneware clay, wax, plasteline, paper clay, and epoxy putty- but for all of them the techniques used vary little. This tutorial centers around designing, sculpting, molding, casting and finishing a piece."
Make a Bird Bead and Earrings

How to make a stylized bird as a bead using Creative Paperclay. Finished bead is made into earrings.
How to Make a Poseable Hand

This air-dry clay tutorial from Minenko shows us how to model thin, delicate, but strong fingers. It is loosely translated below from Russian to English. Please go to her website for step by step photos and full hand modeling tutorial.
Minenko says the materials needed for this project are:
- Wire to build the frame of the hand (any thin: copper, floral,)
- Floral tape (sticky paper tape in various colors, sold in florist shops) for covering wire
- Your choice of air-dry clay (LaDoll or Creative Paperclay suggested)
- Creative mood
Very Easy Jointed Doll Tutorial

This is a short photo tutorial from a Russian website for a string-jointed doll (wire is actually used). No translation is needed as there is no text. Writer doesn't say what kind of clay is used but this looks to me like a perfect project for Creative Paperclay. Because the doll is simplified and stylized, just about any sort of clay with any level of detail would be suitable. Some of the completed dolls shown have a sculpted face and some are just round balls with painted features. The choice is yours! Great beginners project....enjoy!

Fairy Art Doll Tutorial

K.Michelle from K.Michelle Creations shares a clever tutorial for making this easy fairy art doll using papier mache & paperclay. Other materials used include a Styrofoam ball and a foam cone plus wood dowels, a wood base, wire, paint, embellishments of your choice and typical tools such as glue and wire cutters.
Making Paperclay Doll Eyes
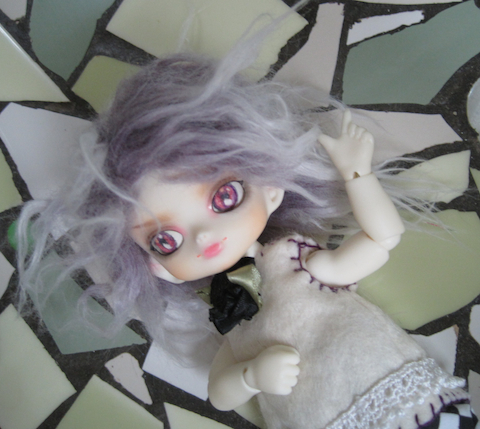 |
| Eyes colored with pencils worn by Dollzone Leo |
Author of tutorial says making Paperclay eyes for your doll is very simple. The eyes shown here started as beads of Creative Paperclay and were colored using artist pencils and acrylic paint. A glossy finish was sprayed on. These eyes were created for a BJD doll but could be used with any clay figure. Read entire eye tutorial here.
Art Dolls: Clay Over Cloth How-to
 |
| "Frost Fairy" a clay over cloth doll by Yve |
Sculpting Head and Face for BJD
 |
| ~ click photos to enlarge ~ |
Linda Macario, the Italian doll-maker, has written a wonderful tutorial for creating the head for a BJD (ball-jointed doll) . LaDoll air-dry clay is suggested. Creative Paperclay would also be suitable for this project. Lots of photos demonstrate how to sculpt the Styrofoam core, apply the clay, model the facial features, hollow out the head & insert the eyes and also create the head articulation.
How to Create This Art Doll including How to Sculpt Head and Build Body

Paperclay doll by Oksana Dyachenko
Excellent, detailed tutorial for creating a mixed media art doll by Oksana Dyachenko. Some interesting and unique techniques shown that I've never seen before. Creative Paperclay is used to sculpt head, hands and feet with abundant step-by-step instructions for modeling face and hands along with painting details. This is a very long tutorial with lots of steps and lots of photos. You'll probably do best if you follow along one step at a time. Don't skip around ....you might miss something important. There's really a lot of information in this tutorial!
Steampunk Paperclay Book

This tutorial from Terri Sproul creates a Steampunk* Paperclay Book with embellishments such as safety pins and lots and lots of scrapbooking items. Artist uses interesting techniques to create a one-of-a-kind piece.
*Steampunk is a genre that originated during the 1980s and early 1990s and incorporates elements of science fiction, fantasy and alternate history. It involves a setting where steam power, gears, clock parts and mechanical devices are used in unique ways. Various modern utilitarian objects have been modded by individual artisans into a pseudo-Victorian mechanical "steampunk" style. (wikipedia.org)
Paperclay Stump Doll

Stylized and aged with crackle finish, this 'Dancing Girl' Paperclay stump doll from Miss Sophie Arts looks like it'd be a lot of fun to make. The author sculpts heads and necks from Paperclay but their bodies use a paper mache technique.

Divine Decadence Stump Doll

This gorgeous stump doll was created by Arley Berryhill. It is made of Creative Paperclay and covered in fabric and other embellishments. A "stump doll" has a solid body....no legs. Sculpting details are concentrated above the waist and lower body is usually covered by skirt. The body of a stump doll is often molded around a candlestick or bottle or something else that stands easily by itself.
"Divine Decadence" is a cloth stump doll and stands 22" tall. The facemask is cast in Paperclay and covered in knit fabric with glass eyes and polymer teeth. The artist has kindly provided step-by-step photos of the work in progress so you can see how he did it and be inspired to create your own stump doll with Paperclay.

Lacey Decorated Bowl

Supplies needed to make this decorative air-dry clay bowl include tool for rolling out clay to flat sheet, lace or doily for embossing, a bowl to use as a mold, acrylic paint in color of your choice, a top coat/sealer and, of
Subscribe to:
Posts (Atom)