In this multi-part art doll demonstration, we've been following Olga Egupets as she shows us her techniques for making armatures, modeling faces, body parts and props, painting the doll and creating clothing. This is Part 7, the final video in the series. Olga finishes her doll by adding a wig using needle-felting techniques and wool roving. Then she creates a leather-look display base from wood and paper and the doll with her new black dress is done!
Air Dry Clay Tutorials
Tips and Tutorials for sculpting and modeling with air-dry, no-bake, self hardening clays and modeling compounds
Showing posts with label dolls-shoe. Show all posts
Creating an Art Doll, Olga style, Pt. 7 of 7: Wig & Base
In this multi-part art doll demonstration, we've been following Olga Egupets as she shows us her techniques for making armatures, modeling faces, body parts and props, painting the doll and creating clothing. This is Part 7, the final video in the series. Olga finishes her doll by adding a wig using needle-felting techniques and wool roving. Then she creates a leather-look display base from wood and paper and the doll with her new black dress is done!
Creating an Art Doll, Olga style, Pt. 6 of 7: Making the Clothes
| Finished doll |
In this multi-part art doll demonstration, Olga Egupets shows us her techniques from start to finish, demonstrating armatures, modeling faces, body parts and props, painting, wigging and creating clothing. When making her dolls, Olga uses a variety of materials, including air dry clays such as Creative Paperclay, LaDoll, Plastiform, Efaplast etc. This doll has a sewing machine on her lap because she has just finished sewing herself a little black dress. This is Part 6 of 7, 'Making the Clothing'.
Creating an Art Doll, Olga style, Pt. 5 of 7: Making the Props
| Painted doll at end of Part 4 |
Creating an Art Doll, Olga style, Pt. 4 of 7: Painting
| Stage 3 finished! |
In this multi-part art doll demonstration, Olga Egupets shows us her techniques from start to finish, demonstrating armatures, modeling faces, body parts and props, painting, wigging and creating clothing. When making her dolls, Olga uses a variety of materials, including air dry clays such as Creative Paperclay, LaDoll, Plastiform, Efaplast etc.
This is Part 4 of 7. Please go here for Parts 1 and 2. Part 3 is here In the first 3 steps, Olga created her armature and body form, coated it with a layer of papier mache to give it bulk and gave it a smooth finish with a brushed-on top coat (finished doll at this stage is shown above). She also finished modeling the face, hands and feet using LaDoll clay.
Creating an Art Doll, Olga style, Pt. 3 of 7: Sculpting
| papier mache stage complete |
In this multi-part art doll demonstration, Olga Egupets shows us her technique from start to finish, demonstrating armatures, modeling faces, body parts and props, painting, wigging and creating clothing. When making her dolls, Olga uses a variety of materials, including air dry clays such as Creative Paperclay, LaDoll, Plastiform, Efaplast etc.
Creating an Art Doll, Olga style, Parts 1 and 2 of 7
Olga E. Egupets was born in Deep Eastern Kazakhstan. In 2000, she decided to try making dolls and soon became very popular among collectors and lovers of art dolls, both in Russia and abroad. At first it was small size works but her current dolls are quite large. In this multi-part demonstration, Olga shows us her technique from start to finish,
Doll Shoe Week: Ballerina Flats
We'll end our week of creating doll shoes with a simple pair of flats. The ballerina shoes shown above were created with lined silk. Use a different fabric and you'll create an entirely different shoe!
Doll Shoe Week: Bunny Slippers
I made these bunny slippers a couple years ago for a cloth doll. They're glued on. But there's no reason they can't be made for a clay doll or made as removable slippers. Here's how I made this pair.
Materials:
White felt
Pink felt or fabric or paint
Small piece of white lightweight sheepskin fabric or something fuzzy
Pink embroidery floss
2 tiny black beads
Small piece of cardboard (cereal box will do)
Doll Shoe Week: High Heel Strappy Pumps
Another shoe idea from By Tarja Simpanen at Fashion Doll Shoes. In this tutorial she demonstrates making a high heel pump with ankle strap using a fabric ribbon.
Notice in the first step, when fitting the sole of shoe to dolls foot, that she is creating a "fake" toe area that will be left empty for this
Doll Shoe Week: Summer Boots
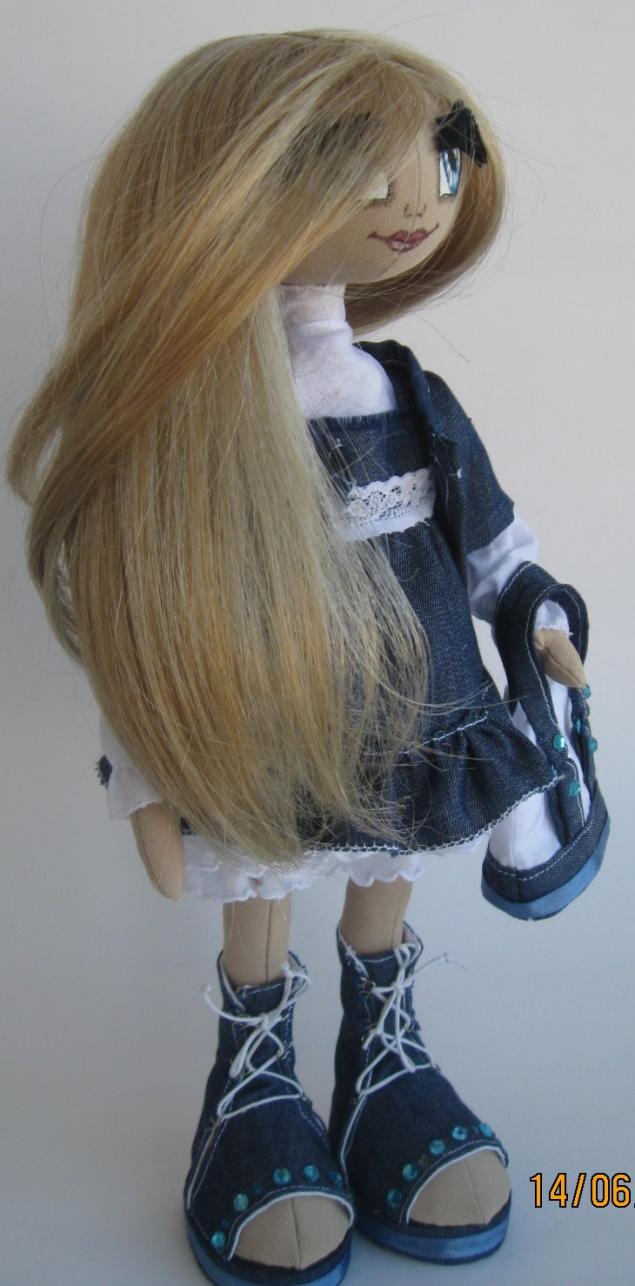
Stylish summer boots for your doll. This step-by-step photo tutorial from a Russian website creates these shoes with denim (or other fabric), yarn, cardboard, scissors, dress hooks, thread, satin ribbon, glue and rhinestones. Author says: "I think that nobody needs to explain what shoes mean to women." ;-)
Shoe Week: High Heel Platform Shoe for Dolls
Shoe Week: How to Make a Custom Doll Shoe
There's a large percentage of air-dry clay fans who like to create dolls...human figures and fantasy figures. Some of these are fixed in position and some are poseable. Some are simple sculpts, some are cloth dolls with clay limbs and some are sophisticated BJDs. There's many ways you can model a figure but what they all have in common is the need for shoes! You can always sculpt any kind of shoe with your favorite clay, but sometimes we like to have a fabric or leather shoe! All tutorials featured this week will be devoted to crafting shoes for dolls of all sizes and shapes, removable and non-removable! Let's start with some Mary Jane's and basic shoe-making skills.
Subscribe to:
Posts (Atom)