

Air Dry Clay Tutorials
Tips and Tutorials for sculpting and modeling with air-dry, no-bake, self hardening clays and modeling compounds
Showing posts with label cold porcelain. Show all posts
Showing posts with label cold porcelain. Show all posts
Snoopy

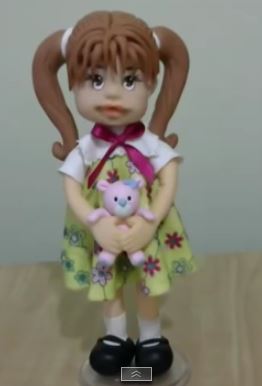


Easter Bunny Tutorial

Step by step photo demo to make this Balancing Bunny cake topper from Rouvelee's Creations. Uses Styrofoam balls for body armature and Styrofoam eggs covered in clay. Fondant was used here but cold porcelain or any of the softer types of air dry clay would be suitable.
How to Model the Head of a Doll or Figure

Many air-dry clay projects call for Styrofoam shapes as armatures for figure modeling In the following video, while at a craft show, Marisol shows us how to wrap a foam ball and model the head of a doll or figure. She also demonstrates her method for creating eyes, which are normally painted on.
Make a Ballerina Doll

Clay used in this tutorial is a soft air-dry clay such as Makin's Clay, Deco Clay or Cold Porcelain. Some white, a small amount that's been tinted pink, and a larger quantity tinted flesh.
- Cut a strip of pink clay for bodice. Tool shown is a fondant cutting and embossing tool
with changeable blades for creating different textures. It's inexpensive and works well with the soft clay.
- Use circle cutter to cut white circle. This will be undergarment.
- For head, wrap a foam ball with flesh clay, starting with a ball of clay about same size as foam ball.
- For torso, wrap a foam ball with flesh clay, starting with a ball of clay about twice the size as foam ball and shaping clay into a teardrop shape.
- Roll 2 flesh colored logs for legs. Set aside to dry until needed.
- Wrap white circle cut in step 2 around bottom of torso and add texture.
- Roll 2 more flesh colored logs for arms. Flatten ends for hand and use scissors to cut a notch that will create thumb. Set aside to dry until needed.
- Attach legs to body in sitting position. Use white glue if needed to hold in place.
- Wrap pink bodice made in step 1 around top of torso.
- Make shoes from pink and white as shown in photo and attach to leg. Strengthen joint with piece of toothpick and a little glue.
- Make a tutu from pink fabric and wrap around torso. Stitch to hold secure.
- Attach head. Strengthen joint with piece of toothpick and a little glue.
- Attach arms.
- Let doll dry and cure until OK to handle without damage.
- Glue yarn or string onto head. Trim for cute hairdo.
- Make a bow from clay and glue to top of head.
- Use acrylics to paint eyes, lashes and mouth. Use powder to blush the cheeks.
- Use a dot tool and white acrylic paint to place dots in eyes, on cheeks and all over bow and bodice and you're done!
Modeling a Doll with Paperclay, Part 4 of 4. Dressing & Posing
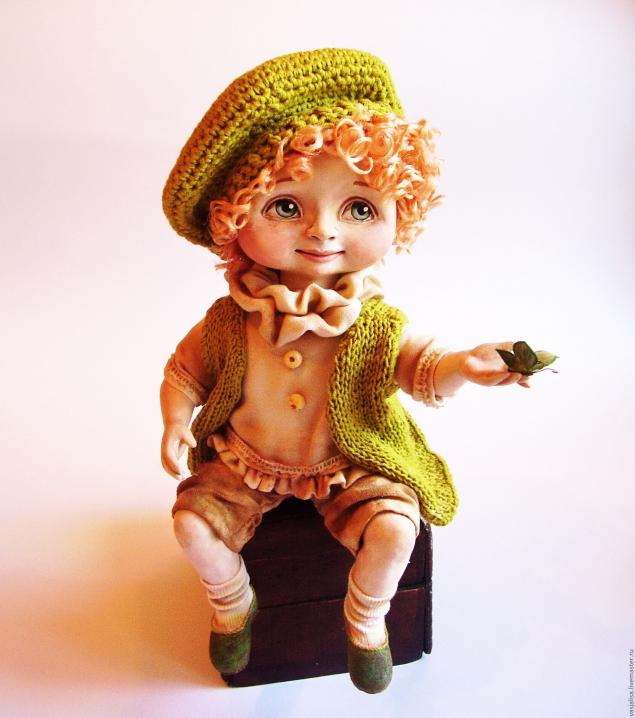
Hope you've enjoyed this 4 part tutorial and the techniques presented to create this cute doll made of Creative Paperclay. Cold porcelain and many other air-dry clay brands could be used in the same manner.

This series of tutorials is presented in Russian, please use Google Translate (or your own favorite tool) to convert to your language.

Jorge Rubicce Basic Doll Head Demo
 |
| Cold Porcelain figure by Jorge Rubicce |
In the following video, master craftsman Jorge Rubicce, shows us his method for modeling the head of his cute cold porcelain figures. He starts with a Styrofoam ball (for armature) and an equal size ball of cold porcelain to create an egg shaped head. Notice that he uses his palms to form the cold porcelain and always works toward center. He also applies hand cream to his hands while smoothing out surface of cold porcelain.
Lalaloopsy tutorial

This would be a suitable project for cold porcelain, Creative Paperclay or any one of the soft clays.
Cold Porcelain Tips from Marisol
 |
| Marisol Romero |
What is Cold Porcelain? Cold Porcelain (CP) is a modeling compound that is composed of white glue and cornstarch. The recipe for cold porcelain is quite simple and it can be made or home or purchased commercially. CP is a material that can be modeled in small volumes and large. Its characteristics are softness, whiteness and elasticity. CP is known throughout the world, in every region or country, by many different names. Besides Cold Porcelain, it is known as Porcelana Fria, Masa Flexible, Biscuit, and Pasta di Mais among others.
See this page for recipes and how to make Cold Porcelain video. If you make your own dough, keep in mind that, to be of good quality, the ingredients you use should also be good quality.
Marisol Romero is a cold porcelain artist from Argentina, where this medium is very popular. On her website she shares some of her cold porcelain tips. Below are some of her tips translated to English as best as we can!
Make This Cute Bee in a Clay Pot

Materials needed are cold porcelain or other air-dry clay in flesh, yellow, white, green and black; a styrofoam ball for head armature; a small clay pot; some black wire; basic modeling tools; white glue; a heart shaped cookie cutter and a fine point black marker.
Variegated Rose Technique by Rubicce

Create a Leprechaun or Elf

This is a step-by-step tutorial to create an elf (or Leprechaun) using cold porcelain. (He bears a strong resemblance to our mascot gnome...maybe they're cousins! LOL) Instructions are in Spanish but there's many photos showing each step. Google can translate the page for you or you can just follow the photo examples.
Materials needed are:
- Cold porcelain (CP) paste (or other air-dry clay)
- White tempura is used to tint white CP, acrylics may be used
- Oil paints are also used to pre-tint the CP, acrylics may be used instead, if desired. You can also choose to paint the figure after curing, but pre-tinting usually works best. Suggested colors are brown (umber), green (leggings), blue (vest), a skintone, and fuscia for shirt. Of course, if you're making a Leprechaun, you might want to use some other colors.
- 2 Styrofoam spheres (#4) for head and body
- White glue
- paint brushes and clay modeling tools
- a wood base
- hand wipes to keep hands clean
Create the Texture of Wool in CP

Jorge Rubicce imitates wool texture in this cold porcelain video demonstration. He also shows how to create the effect of hair peeking out from under the wool cap. Notice that the head he is working with is fully cured and he uses white glue to attach the additional cold porcelain for the cap.
Subscribe to:
Posts (Atom)